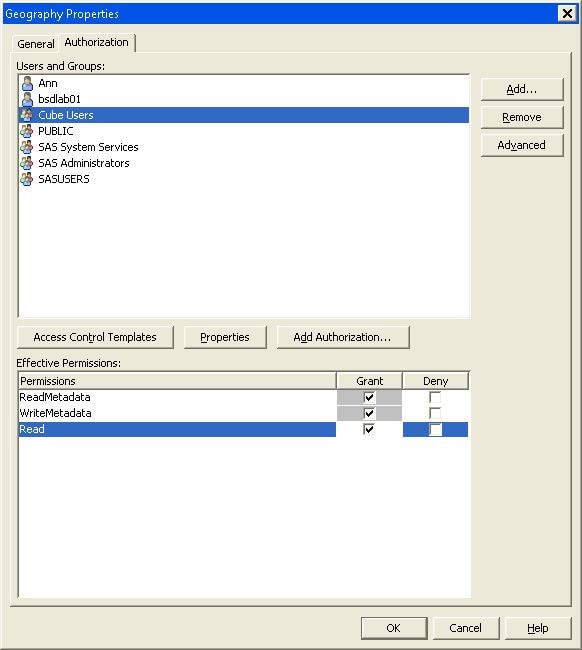
Setting Member–Level Permissions
SAS security enables you to set authorization permissions
on a cube and the various components of a cube. You can apply member-specific
filters to cube data by using MDX expression filters known as permission
conditions. Permission conditions limit access to a cube dimension
so that only designated portions of the data are visible to a user
or group of users. With SAS OLAP data, permission conditions impose
only explicit grants of the Read permission and can be specified only
on dimension objects. You can add member authorizations to a cube
dimension from either SAS OLAP Cube Studio or SAS Management Console.
In this example, a retail company has a SAS OLAP cube that contains
sales data. They need to apply Read restrictions to members of a dimension
that contains data for the method of payment for merchandise.
To select a dimension
from within SAS OLAP Cube Studio, select a cube in the tree view and
drill down to a dimension. To select a dimension in SAS Management
Console:
On the Add
Authorization dialog box, you can create an MDX expression
by specifying members and permissions for the permission condition.
You can choose to create a basic expression or an advanced expression
for a member. By default, the option Create a basic MDX
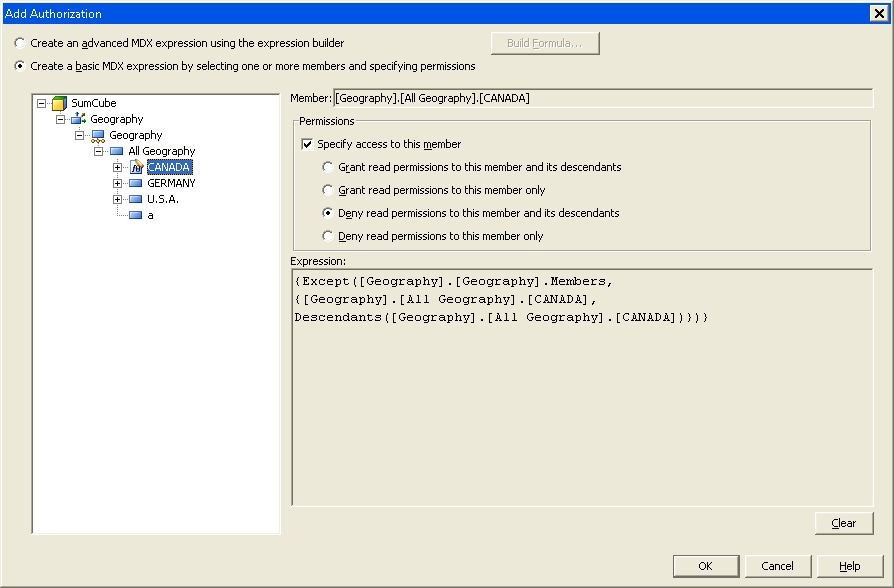
expression by selecting one or more members and specifying permissions is selected when you open the Add Authorization dialog box. In this example, the Geography dimension contains data
for different countries. The members Canada and Germany are restricted
from view for the CubeUsers group. Drill down on the dimension in
the list and select the Canada member. Set the access for the Canada
member.
After you have selected
the basic expression option and a member, the MDX code for the permission
condition will appear in the Member text
field. You can now select the option Specify access to
this member. This enables you to apply a permission option
to the currently selected member or a member and its descendants.
You must select this option to activate one of the grant or deny permissions
options. Click the Deny read permissions to this member
and its descendants option. The MDX code for the permission
condition is displayed in the Expression text
box.
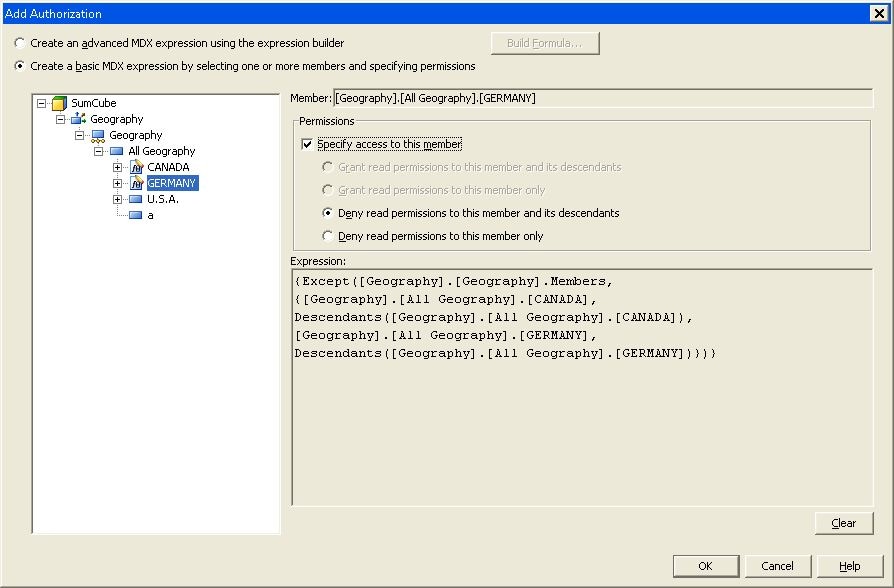
Repeat the process for
the Germany member. The MDX code for Germany is appended to the MDX
code for Canada member in the Expression text
box.
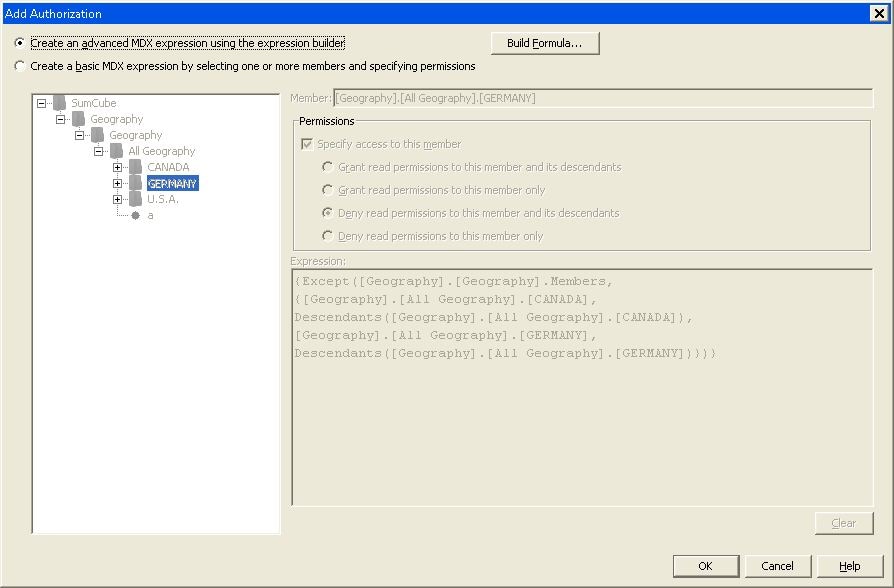
You can also choose
to manually create an MDX expression filter. In the Add
Authorization dialog box, select the option Create an advanced expression using the expression builder. The Build Formula button is now active.
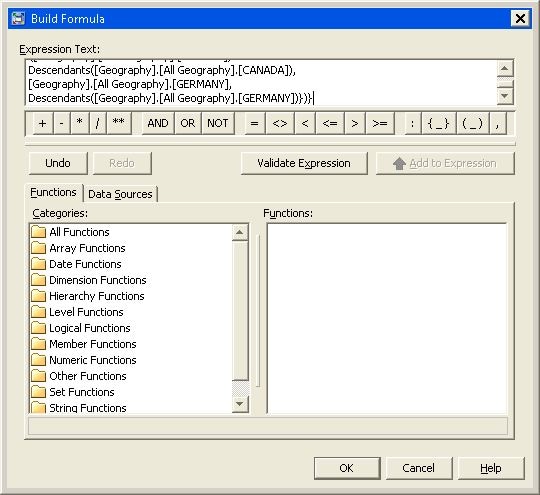
Click Build Formula. The Build
Formula dialog box appears.
Note: If you have already specified
a basic permission condition that denies access to a member, and you
select the Create an advanced expression using the expression
builder option, a message appears that asks: “Do
you want your current expression copied to the expression builder?”
See the following display. Select Yes or No. You can then click Build Formula.
In the Build
Formula dialog box, you can create an MDX filter and
observe the MDX expression as you build it. Use the logical operators
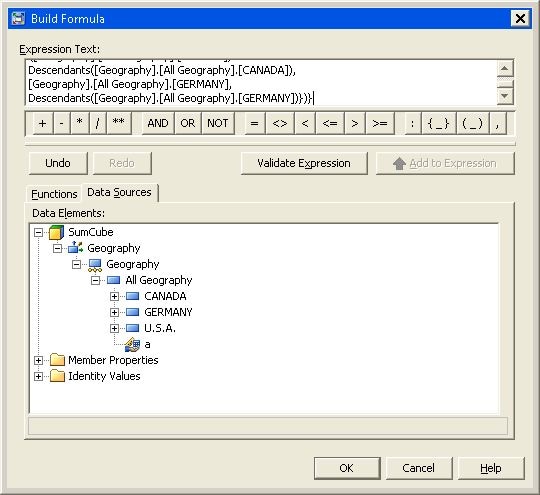
to specify multiple clauses in your MDX expression in the Expression Text text box. Use the Functions tab to add MDX functions to your expression. Use the Data Sources tab to browse through the dimensions and
hierarchies in your cube and select the members that require access
control. You can use the Add to expression button to add your selections to the Expression Text text box. You can also check the accuracy of the expression that
you are building by selecting the Validate Expression button. When you are finished, click OK. You will return to the Add Authorization dialog box. Select OK again to save the
permission condition and return to the Properties dialog box.
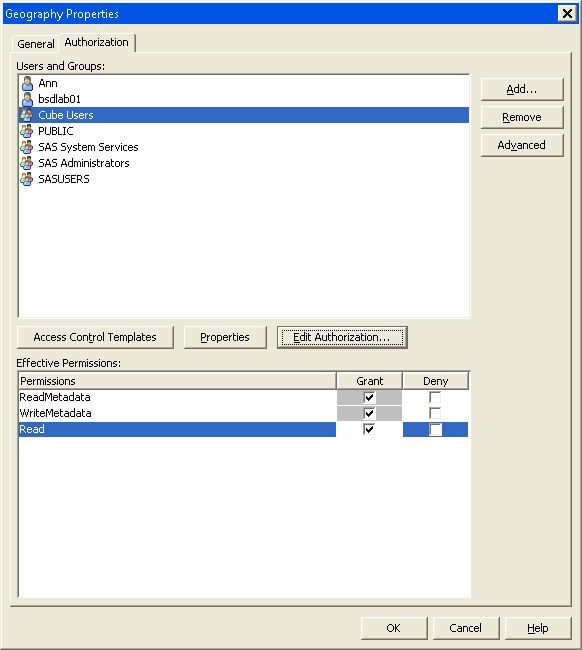
After you have defined
permission conditions for the dimension, the label for the Add Authorization button changes to Edit
Authorization.
If you later click Edit Authorization to edit a permission condition, the Build Formula dialog box will open. You can then make
any needed changes to the MDX code. Select OK to save the permission condition and return to the Properties dialog box.
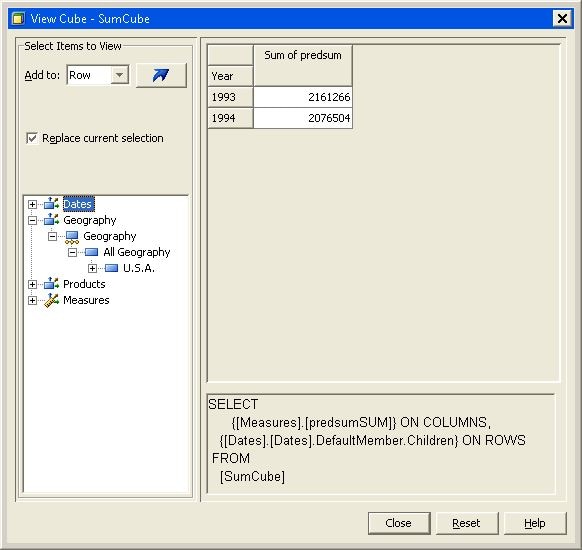
After you have applied
the permission conditions, you can validate the Read restrictions
with the View Cube function in SAS OLAP Cube Studio. In SAS OLAP Cube
Studio, select the SALES cube and click View Cube from the Actions menu. You can see in the
following display that the members Canada and Germany are not available
for view on the Geography dimension.
